Showing posts with label DIY. Show all posts

Tuesday, September 6, 2016

Bible Journaling Part 1

Since one of my 30 in 30 goals is to finish reading the whole Bible (ps. not gonna make it lol), I've ventured into the wonderful world of Bible journaling and Illustrated Faith. Yay!

bible journaling, illustrated faith, faith journaling, mixed media, scripture, bible, esv bible, paint, project life
Outside Cover. (Materials used: acrylic paint, 4x6 project life journaling card, dollar tree letter stickers)
At first I wanted to get an actual "journaling Bible" with the wide margin and fancy thick paper, but they carry quite a hefty price tag at $50.  Needless to say, that is way out of my budget for a new hobby/craft.  Instead, I went to my local goodwill and bought a paperback English Standard Version Bible for 99 cents ^.^

bible journaling, illustrated faith, faith journaling, mixed media, scripture, bible, esv bible, paint, project life
Inside Cover. (Materials used: watercolor pencils, watercolor paint, black precision pen)
As you can see, I created a cover for the front and water-colored a bit on the opening page.  That first 'entry' was the hardest.  I mean, as a child, I was taught NeVeR to write in the Bible unless you were highlighting scriptures.  So the idea of drawing in the Bible was a complete departure from anything I've ever done.

bible journaling, illustrated faith, faith journaling, mixed media, scripture, bible, esv bible, paint, project life
Genesis 1:31 (Materials used: gel matte medium, gelatos, acrylic paint, gold paint pen, black precision pen)
Now because I got a regular Bible, the pages are quite thin.  This problem let me to pick up a few mixed media supplies.  I purchased a bottle of gel matte medium from Michaels and that is perfect for coating the pages and preparing the for painting or whatever kind of media I decide to put on them.

bible journaling, illustrated faith, faith journaling, mixed media, scripture, bible, esv bible, paint, project life
Genesis 9:11-17 (Materials used:gel matte medium,acrylic paint, gold and silver paint pens, yellow marker)
I also got a pack of gelatos pigment sticks, a container texture paste and stencils, watercolor pencils, and various kinds of paints to use in my entries. 

bible journaling, illustrated faith, faith journaling, mixed media, scripture, bible, esv bible, paint, project life
Exodus 3:13-14 (Materials used:gel matte medium, gelatos, sharpie)
I've enjoyed using acrylic and watercolor paints on the different pages, depending on what "feel" I'm going for.  For instance, acrylic paints will cover the print on the pages completely while watercolors or gelatos stay transparent. 

bible journaling, illustrated faith, faith journaling, mixed media, scripture, bible, esv bible, paint, project life
Exodus 20:1-17 (Materials used: watercolor pencil, silver paint pen, black precision pen)
I will say, I'm not very good at using the watercolor pencils yet.  I'm having a hard time getting them to blend properly.  But no worries! There are plenty other scriptures to practice on and be inspired by.

bible journaling, illustrated faith, faith journaling, mixed media, scripture, bible, esv bible, paint, project life
Joshua 1:9 (Materials used: watercolor paint, sharpie, white acrylic paint, gold paint pen, washi tape)
My dream, when it comes to my Bible Journal, is to fill it up and keep it on our coffee table next to the family Bible Lamar and I got as a wedding gift.  That way whenever friends and family come to visit, they can see and explore it.  I think that will be awesome!

Thursday, September 1, 2016

Great Gifty Friends!

I was beautifully blessed with some fun gifts from friends this past weekend ^.^

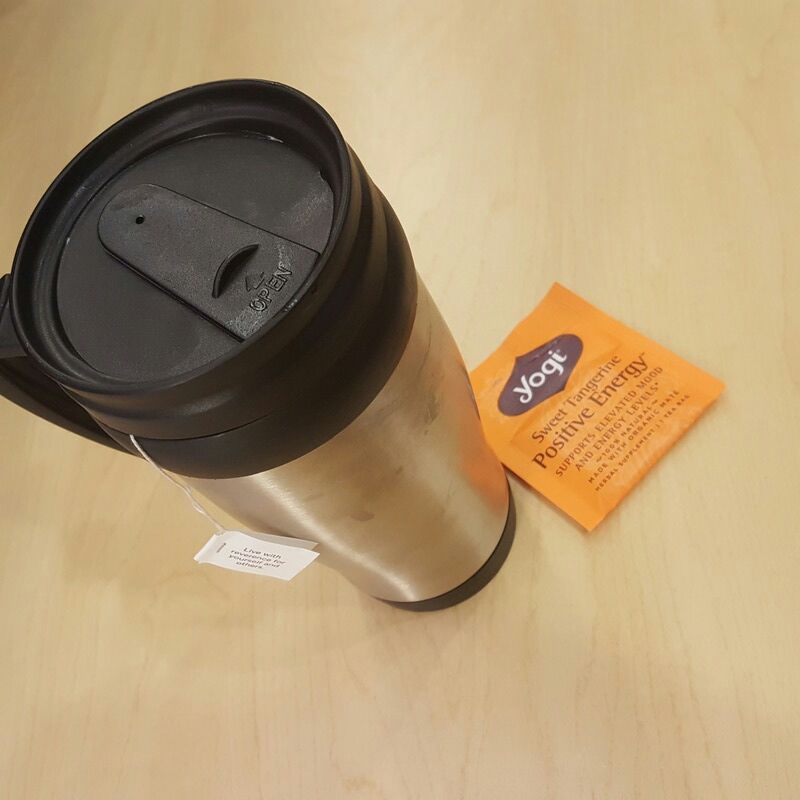
My friend Tiff gave me a couple samples of tea (Wild Chaild and Sweet Tangerine).  I drank the tangerine one already and it was delicious!!!  I will def be buying a box of that asap!  She also gave me a cutting from her mint plant.  All the excitement is mine!!! I'm going to plant the cutting and brew tea from the leaves ^.^  I keep envisioning myself drinking nice cups of tea from my huge mint bush while sitting on the front porch during a nice summer rain shower.  That sounds like a wonderful Sabbath afternoon...

tea time, yogi tea, gifts, good friends

The other gift came from my friend, Erica.  She found a bag of fabric while cleaning out her garage and gave me the whole thing! o.O  What what!!!  Talk about an awesome crafty gift ^.^  There were quite a few large pieces that I can use for bag making and also some that will be really nice for garments.  I'm so excited to dig into this new stash soon!

fabric, gift, good friends

Crafty, gardeny, tea loving friends are the BEST!!! lol :)

Friday, August 12, 2016

Finally I'm Finished: Bag Lady

Since kicking the door down to the knitting world, I have fallen down another rabbit hole...

The Wonderful Beautiful Practical World of Project Bags!!!

No more ziplock bags for me ^.^

A project back is a zippered, draw string, or other type of bag specifically to keep a crochet/knit project in.  Kinda makes sense huh?  Anywho, I first decided to make one to house my California travel project.  So I dug through my fabric stash and found a couple prints to use.

sewing, knitting, crochet, project bag, zipper bag, makeup bag, fabric, diy, handmade

For the pattern, I just googled instruction for making a zippered bag.  It came out pretty good for a first go :)  And now I'm completely smitten with the idea of keeping my things in project bags.

sewing, knitting, crochet, project bag, zipper bag, makeup bag, fabric, diy, handmade

Now, of course, I wanted to make more for new projects, and because these little bags were in my mind - I was bitten by the fabric stashing bug.  I started gathering fat quarter cuts and bits from Joann's remnant basket and jumped right into the sewing.  This time I used Nicole of Hue Loco's Holiday Bag pattern.  The pattern was written very well and the accompanying tutorial video helped with any questions I ran into.

sewing, knitting, crochet, project bag, zipper bag, makeup bag, fabric, diy, handmade

A couple days after starting my second project bag, I had 4 new bags made!  I love how they came out and I've been putting them to work regularly ^.^  I do want to make a couple more in a larger size for projects bigger than socks.  I've put together some preliminary fabric combos and hopefully I'll get to work on those in the coming weeks.  Well... after I buy a zipper foot for my sewing machine because I've been struggling along without one so far.

sewing, knitting, crochet, project bag, zipper bag, makeup bag, fabric, diy, handmade

Getting back into sewing has definitely rekindled my love for the craft.  I've been daydreaming of all the new clothes I could make with a bigger work space.  (I'm currently sewing on the corner of the dining room table.)

So yeah!! Happy crafting to me! ^.^

Thursday, June 30, 2016

Yarn Crafter Mini Haul

Recently, I did a little bit of yarny online and in-store shopping! Yay!  Normally I don't do much online shopping because I enjoy the instant gratification of taking my new toys home right away.  But back when I was knitting my first hat a friend on instagram suggested I order some bamboo needles from amazon.  So I did :)

16 inch circular knitting needles, hat knitting, knitting, black girls knit

I purchased a set of 16 inch and 40 inch circular needles from amazon for less than $15 Huzzah!  Now I have no excuse not to try new and challenging projects. So far, I've started one new project with these needles and the tips were a little splintery, but that was fixed by buffing them with a nail file.

40 inch circular knitting needles, sock knitting, knitting, black girls knit

While I was waiting for the needles to come in, I decided to pick up some new sock yarn.  I purchased all three skeins from Joann's.  I can't make up my mind on which colorway I'm most excited about.  I just wish I could knit faster ^.^

yarn, sock yarn, wool free, diy socks, knitting, black girls knit

yarn, sock yarn, wool, diy socks, knitting, black girls knit

Wednesday, June 22, 2016

WIP Wednesday: Almost Wasn't

Today's work in progress project doesn't have a name... It came about because I had one skein of Martha Stewart Extra Soft Wool Blend yarn and I wanted to make something that would take up the whole thing. 

apartment 203 knits, ravelry, handknit, knitted hats, diy hats, handmade, knitting, yarn


So I took to Ravelry and browsed what other people had made with one ball.  I came across a "Variation on a Basic Hat" by a user called Gmax4.  I started knitting the hat and quickly got frustrated by the stiffness and wonkiness of the cord and I kept saying, "I'm gonna rip this out..."  But as you can see I didn't.

apartment 203 knits, ravelry, handknit, knitted hats, diy hats, handmade, knitting, yarn

The little lace pattern is from GmaX4's pattern, but the other mods are mine.  I did a 2x2 ribbing instead of 1x1 and my finished hat will have a total of 4 lace repeats instead of 3 as in the original hat.  I may even end up putting in more repeats because I want it to be slouchy enough to handle all my hair ^.^  Currently, I'm up to the point to add in the third lace repeat.

apartment 203 knits, ravelry, handknit, knitted hats, diy hats, handmade, knitting, yarn
First lace repeat finished.

apartment 203 knits, ravelry, handknit, knitted hats, diy hats, handmade, knitting, yarn
Second lace repeat and a bit of stockinette finished.

One thing I've really been aware of during working on this project is how much the type of needles affect the knitting.  I'm using some needles I picked up at Joann's for like $3 after my coupon.  Since I'm working the hat magic loop, I've been fighting the cable because it just wants to curl up on itself.   Then in the lace repeats I have to do k2tog (knit 2 together) and because the needle tips are so blunt, it is quite the struggle getting the needle behind two stitches at a time.  But I'm pressing through.  I'm assuming this hat will be finished within the coming week and I'll be able to add another item to my stack of hand-knits!

Thursday, May 5, 2016

Hook and Needle Adjacent Dreamin

I've had a profile on Ravelry for a few years now.  I never use to be very active on the site though.  Recently, since discovering a love for shawls, I've found myself on there more often drooling over patterns.  Within my time on Ravelry, I've amassed quite the library ^.^

Currently I have two projects going, one crochet and the other knit.  And lemme tell you, I'm itching to start something new!!  So I'm going to plan my next couple projects because actually starting something right now is probably a bit obsessive. lol!  I've chosen 2 crochet patterns and 2 knitting ones.  So here we go!

1. All Shawl by Doris Chan

http://www.ravelry.com/patterns/library/all-shawl
Click Photo for Pattern Page (Photo by Doris Chan)

This is a super simple crochet shawl pattern.  I really like that the pattern is very flexible, you can make it as long or short as you like and gauge doesn't really matter.  It looks like a quick project to make and probably won't take much more than a week.

2. Sonny's Socks by Sonny321

http://www.ravelry.com/patterns/library/sonnys-socks
Click Photo for Pattern Page (Photo by fmlcrochet)

I am very interested to see how crochet socks wear and feel.  I think if I like the texture I'll definitely have many more handmade socks ^.^  I like the shell stitching on these and they look comfy.  We'll soon see!

3.   Ventura Wrap by Rebecca Hill

http://www.ravelry.com/patterns/library/ventura-wrap
Click Photo for Pattern Page (Photo by MissBecca)

To continue with my love affair with shawls :)  I'm going to try knitting this one.  It will be my first knit shawl.  Allegedly, it's an easy pattern.  I'll be the judge lol!  But hey, I have youtube and a local yarn store if I get helplessly stuck.  I'm excited about this pattern.

4. Seaforth Hat by Karie Westermann

http://www.ravelry.com/patterns/library/seaforth-2
Click Photo for Pattern Page (Photo by David Fraser)

I think this is going to be the most ambitious of all my hook/needle adjacent projects.  I'm actually quite nervous to attempt this, but just like the Ventura Wrap, I have youtube and knitters nearby to help me if needed.  I really want to make this hat because, 1- it's really pretty and 2- I'm getting a little tired of wearing my same old crochet hats to work.  I want to switch it up.  Or maybe that means I need to design a new crochet hat... that's a possibility!

So there you have it!  Four projects that I will hopefully be starting within the near future ^.^  My Ravelry pattern library is bursting with projects that are inspiring me and I'm so glad that I found that site! 

Wednesday, April 20, 2016

Adventures in Dyeland pt. 1

One thing that I've been getting more interested in lately is hand-dyed yarn.  So many of the podcasts I watch have connected Etsy shops where they sell yarn, project bags, and other yarn crafting whatnots.  The colors of the yarn and all the different looks are absolutely jaw dropping!  And so, like the good DIY gal I am, I bought some white sock yarn, wound it into a hank on my niddy noddy, and tried my hand at dying it.

how to hand dye yarn at home with food color, things you need
::What You Need - Yarn, Vinegar, Food Color, (not pictured) Pot, Stove-top, Water::

This wasn't my first go at hand-dying. I did some back when I lived in Alabama. That yarn actually got crocheted up into a pretty striped tam.  Anyway, I used food coloring and Easter egg dye pellets this time.

how to hand dye yarn at home with food color
::Soaking Yarn::
how to hand dye yarn at home with food color
::Dye Bath - Hot Water, Vinegar, Food Coloring::
I set the yarn to soak in water and white vinegar for a while before going into the dye pot on the stove.  The dye bath I made was a bunch of yellow food coloring.  When it got up to a simmer, I put in the yarn.  I chopped up some Easter egg pellets to sprinkle around for a 'speckled' effect, but I let the water simmer too much and ended up with a more tonal overall color.

how to hand dye yarn at home with food color
::In the Dye Bath::

I turned off the heat and let the yarn marinate in the pot for about an hour to soak up as much dye as possible.  Then it was wash time! I rinsed/ washed the yarn with a bit of dish soap until the water ran clear and set it out in the sun to dry.

how to hand dye yarn at home with food color
::Rinsing Yarn::

how to hand dye yarn at home with food color
::Exhausted Dye Bath::
I will confess the color isn't exactly what I saw in my head.  It came out much more orange because of the pellets.  I have a couple more skeins of white yarn to play with and I'm hoping those will be better.  I also want to try dying yarn with plants.  I think that will be a really cool adventure.

how to hand dye yarn at home with food color
::Finished Yarn::
Have you tried hand-dying anything, yarn or otherwise? I've been known to dye clothing when I get tired of them lol :). Other than my gold color, what other colors should I try?

Friday, April 8, 2016

Finally I'm Finished: The Clover Lace Tank

May I introduce to you, the Clover Lace Tank!  This was a labor of love, lemme tell you!  I think that this tank called for the smallest crochet hook I've used thus far... It's worked up with a 3.25mm hook.  Whaaat?!?!  I've always been one to stick to bigger hooks, well 5.50 and above, for my projects.  I found the smaller hooks to be quite fiddly in my hand and the tiny stitches didn't grow fast enough for me.  So when I came to the 'crochet a top' list item on my 30Before30 list I knew it was the perfect time to make that plunge.

Wide Strap Tank Maz Kwok, 30before30, red heart shimmer, shamrock, green top, diy wardrobe

Enter the Wide Strap Tank pattern by Maz Kwok.  The construction was very simple.  I used Red Heart Shimmer yarn in the Shamrock colorway from my stash.  I also used a Boye ergonomic crochet hook with a rubberized handle.  That made using the tiny hook way easier on my hand and wrist.  If you're a crocheter and haven't used any of those ergonomic hooks, you should get a Joann's coupon and buy one! 

Wide Strap Tank Maz Kwok, 30before30, red heart shimmer, shamrock, green top, diy wardrobe

The only thing that eventually got to me was going round and round with the shells on the bottom.  My goodness it got boring!  At one point I was actually falling asleep while crocheting!  I think I had gotten a couple rounds into the shells when I decided to stop and work on the Frankenshirt.  Taking that break was just what I needed, because after Frankenshirt was done, I powered through the rest of this top.

Wide Strap Tank Maz Kwok, 30before30, red heart shimmer, shamrock, green top, diy wardrobe

I made a few modifications to the pattern, nothing to change the structure, but more aesthetic changes.  Primarily, the pattern calls for relief stitches to create horizontal ribs over the upper bust part.  I didn't want them, so instead I just worked regular double crochet stitches.  I like that the change made the overall look of the top less fussy which is more in line with my style.  I also replaced the foundation chain with a foundation double crochet row.  That made the join of the back section more seamless.

Wide Strap Tank Maz Kwok, 30before30, red heart shimmer, shamrock, green top, diy wardrobe

I've worn the tank out once so far.  It wears well and it's very comfortable. If I make this top again I'd definitely narrow out the straps a bit.  Their maybe half an inch too wide for me.  I may also go up a hook size to see if I can get a more loose drape to the fabric.

Start Date: Feb 15, 2016
Finish Date: Mar 7, 2016

Wednesday, February 17, 2016

WIP Wednesday: Cozies and a Cowl

I am currently languishing beneath these two crochet projects... I want them to be finished soo badly, but they're such slow going!  The first is a large order of Beauty & the Beast themed cup cozies.  I have five or so left to make and then on to sewing on the contrasting details.  They are really cute and all, but man oh man are they quite boring to crochet!  lol!

crochet cup cozy beauty and the beast theme belle's gown yellow yarn disney

The pattern is very simple.  Just 12 rounds of single crochet with 30 stitches per round.  I decided to work in joined rounds instead of a spiral because sometimes I slip into auto pilot and would totally lose count while spiraling.  Originally, I was going to crochet a chain with the darker yellow and attach it around the cozy body, but I didn't like how it looked.  So after a bit of brainstorming, I decided to switch to two strands.  I think it looks much better.  Wish me speedy fingers as I need to get these finished this week!

crochet cup cozy beauty and the beast theme belle's gown yellow yarn disney

The second project that is loooooming overhead is a hooded cowl with ears.  I started working on this a few weeks ago and got all the way through the cowl part and into the hood... only to realize that it was going to be too small.  So I had to frog the whole thing out and start over again.  Something about frogging and restarting a project really takes the wind outta your sails -___-  Anywho,  this is how far I've gotten in the reboot.

crochet hooded cowl with ears fox ears handmade winter accessory
 
I'm working from an inspiration photo my friend sent me (-via Ravelry-).  I originally wanted to make the piece out of a super bulky yarn, but I couldn't find any in the right color.  So I'm holding 2 strands of red heart worsted together.  Even though the yarn is very thick, it still is slow going.  I just wish these projects would go faster so I can start on other things!

This experience has shown me that when I commit to projects like these I need to try my best to knock them out immediately.  Since they're been in progress so long I'm really losing my steam behind them, but I have to finish.  I need to get re-motivated.

I know that after I finish these pieces, I'm taking a nice break from crocheting anything for other people.  I've been doing more daydreaming and project planning for things I want to make myself.  I just need to get these done in order to start those new things.

Thursday, January 21, 2016

December Daily 2015 Walk Through


We've got a lot of first today! My first "real" youtube video (meaning not a video I posted for storage ^.^) and my first completed December Daily album! Whoop whoop! And I'm glad to say I didn't sound as weird as I expected to.  Yay!

This is a photo of my "filming setup" ^.^ I have my camera tripod on the bed with my ipad balanced atop it and a mug to make sure the ipad stays.  I stood on a step-stool so I could see what was in frame and turn the pages at the same time. Talk about making it work!  I think it game out pretty nicely considering the behind-the-scenes.

I hope you enjoyed the walk through of my December craftings!

Friday, January 8, 2016

Listers Gotta List: December 2015 Wrap-Up

I decided to do the December Listers Gotta List (by The Reset Girl) a little differently than the other couple months I made.  This time I used a 6x6 paper pad for each list and created a sort of mini album.  I originally had each page inside the album with my December Daily, but that got too fat too quick!  I really liked how thoughtful I had to be for this project.  I put a lot of emphasis on being intentional with memory keeping during the month and since a bunch of the prompts were memory based, it was nice sit an sift through my brain.

So without more ado, here is my December 2015 Listers Gotta List!  Enjoy ^.^

december 2015 listers gotta list the reset girl scrapbook paper craft diy mini album memory keeping project life december daily

december 2015 listers gotta list the reset girl scrapbook paper craft diy mini album memory keeping project life december daily


And because I love making them... here's a flip through ^.^  Happy crafting in 2016!

Friday, November 6, 2015

DIY Scrapbook Kit

This past summer I got into Listers Gotta List and it was quite the scrapbooking gateway drug! Lol!  But seriously, scrapbooking is now my crafting guilty pleasure ^.^  Today I want to show you how I've started making my own scrapbook kits.  I've linked all the available products or substitutes as I go along.

Since I'm a beginning scrapper, I watch a lot of tutorials and process videos on YouTube.  A bunch of the people on there talk about the kit clubs they're a part of and I thought the idea was pretty cool.  So I decided to create a Disney themed scrapbook kit to use with Lamar and my anniversary photos.  Of course I have a TON of pictures from the trip to Disney World because it was my first time and why not photograph everything :)  {Oh, also I printed all of them through shutterfly.com because they frequently put out 101 free print offers.  After shipping you only pay like $9 so I gather a whole batch and print everything at the same time.  I'm in the process now of checking out other sites, but for the time being shutterfly is working for me.}
 
Disney DIY Scrapbook Kit Say Cheese Mickey Mouse Disney World Happiest Place on Earth

In preparation for scrapbooking my pictures, I took a couple trips to my local craft stores where I found the Sn@p! Say Cheese collection which is Disney themed.  I also picked up some other pattern paper from another designer that coordinated.

Disney DIY Scrapbook Kit Say Cheese Mickey Mouse Disney World Happiest Place on Earth
I couldn't find a link to the exact pack I bought, but here is a link to a similar set <here>

Next were stickers.  When Lamar first told me we were going to Disney for our anniversary, I went right out and bought some Mickey & Minnie stickers.  I found a good size set at Joann's (on the right in the photo).  Later on I found the sticker sheet that went with the Say Cheese set at Hobby Lobby.  Thumbs up for both finds ^.^ 

Stickers Disney DIY Scrapbook Kit Say Cheese Mickey Mouse Disney World Happiest Place on Earth
Similar Say Cheese Stickers <here> -- Alternate Mickey & Friends Stickers <here>

I also added in a lot of letter stickers... mostly because I wanted to have options.  So there are probably WAY more than I'll actually use, but whatever.  I'm also finding that I have a weakness for letter stickers... I always want to buy them.  It's getting ridiculous. lol!  The letters are from all over the place: Dollar Tree, Tuesday Morning, Michaels, Joann's, Hobby Lobby.  You know, my regular haunts :)  I tried to keep everything to the traditional Disney color scheme with the blue tossed in as an accent.

Alphabet Stickers Disney DIY Scrapbook Kit Say Cheese Mickey Mouse Disney World Happiest Place on Earth
Scrapbook.com Alphabet Sticker listing <here>, Joann's <here>, Michaels <here>, & Hobby Lobby <here>

The next supply addition to my Disney kit was the Sn@p! Say Cheese pocket page set.  The set came with 2x2, 3x4, 4x4 & 4x6 cards and a bunch of die cut pieces.  Just a whole lotta happy!

Die Cuts Embellishments Disney DIY Scrapbook Kit Say Cheese Mickey Mouse Disney World Happiest Place on Earth
Say Cheese Sn@p! Pack <here>
Journal Cards Project Life Pocket Pages Disney DIY Scrapbook Kit Say Cheese Mickey Mouse Disney World Happiest Place on Earth
Say Cheese Sn@p! Pack <here>

Last, but certainly not least, is the "memorabilia."  I kept our maps, pins, scan cards (well only mine, Lamar has lost his -___-), photo claim card, and game map and cards from the Sorcerers of the Magic Kingdom game.

Memorabilia Disney DIY Scrapbook Kit Say Cheese Mickey Mouse Disney World Happiest Place on Earth

So that's it.  All this stuff fits into a little case I found at Hobby Lobby and I plan to start scrapbooking Disney World soon ^.^  I think I might add some washi tape into the mix and maybe some stamps, but I'm going to keep those out of the container.

Disney DIY Scrapbook Kit Say Cheese Mickey Mouse Disney World Happiest Place on Earth
Storage Case <here>
If you're a scrapbooker or a crafter, do you ever make 'kits' or separate all your project supplies?  Does it help you in your process?  What do you think of my first kit?

Hope you have a wonderful weekend!