Showing posts with label handmade. Show all posts

Thursday, September 1, 2016

Great Gifty Friends!

I was beautifully blessed with some fun gifts from friends this past weekend ^.^

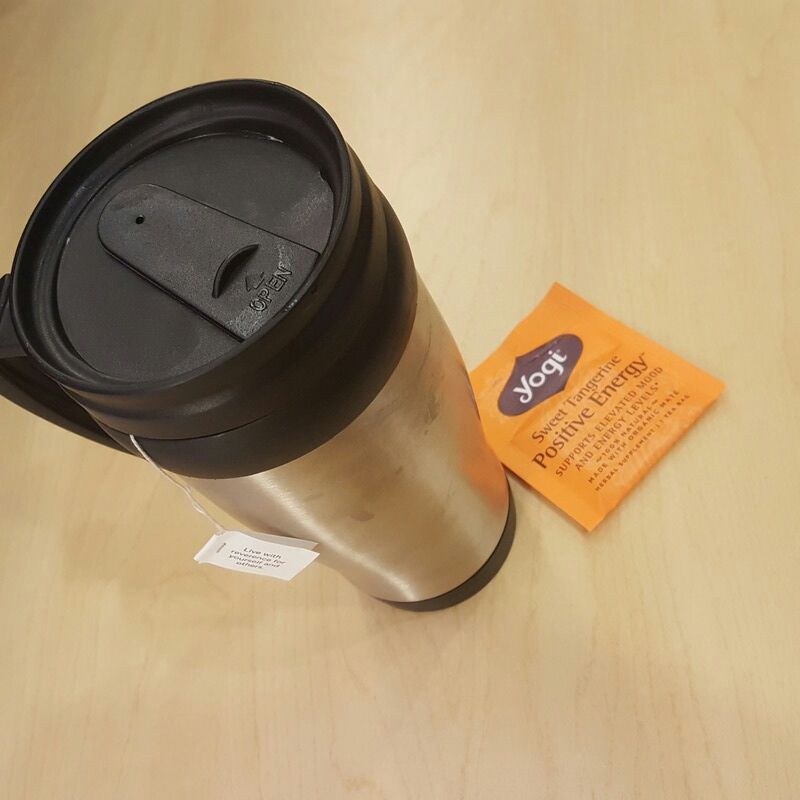
My friend Tiff gave me a couple samples of tea (Wild Chaild and Sweet Tangerine).  I drank the tangerine one already and it was delicious!!!  I will def be buying a box of that asap!  She also gave me a cutting from her mint plant.  All the excitement is mine!!! I'm going to plant the cutting and brew tea from the leaves ^.^  I keep envisioning myself drinking nice cups of tea from my huge mint bush while sitting on the front porch during a nice summer rain shower.  That sounds like a wonderful Sabbath afternoon...

tea time, yogi tea, gifts, good friends

The other gift came from my friend, Erica.  She found a bag of fabric while cleaning out her garage and gave me the whole thing! o.O  What what!!!  Talk about an awesome crafty gift ^.^  There were quite a few large pieces that I can use for bag making and also some that will be really nice for garments.  I'm so excited to dig into this new stash soon!

fabric, gift, good friends

Crafty, gardeny, tea loving friends are the BEST!!! lol :)

Friday, August 12, 2016

Finally I'm Finished: Bag Lady

Since kicking the door down to the knitting world, I have fallen down another rabbit hole...

The Wonderful Beautiful Practical World of Project Bags!!!

No more ziplock bags for me ^.^

A project back is a zippered, draw string, or other type of bag specifically to keep a crochet/knit project in.  Kinda makes sense huh?  Anywho, I first decided to make one to house my California travel project.  So I dug through my fabric stash and found a couple prints to use.

sewing, knitting, crochet, project bag, zipper bag, makeup bag, fabric, diy, handmade

For the pattern, I just googled instruction for making a zippered bag.  It came out pretty good for a first go :)  And now I'm completely smitten with the idea of keeping my things in project bags.

sewing, knitting, crochet, project bag, zipper bag, makeup bag, fabric, diy, handmade

Now, of course, I wanted to make more for new projects, and because these little bags were in my mind - I was bitten by the fabric stashing bug.  I started gathering fat quarter cuts and bits from Joann's remnant basket and jumped right into the sewing.  This time I used Nicole of Hue Loco's Holiday Bag pattern.  The pattern was written very well and the accompanying tutorial video helped with any questions I ran into.

sewing, knitting, crochet, project bag, zipper bag, makeup bag, fabric, diy, handmade

A couple days after starting my second project bag, I had 4 new bags made!  I love how they came out and I've been putting them to work regularly ^.^  I do want to make a couple more in a larger size for projects bigger than socks.  I've put together some preliminary fabric combos and hopefully I'll get to work on those in the coming weeks.  Well... after I buy a zipper foot for my sewing machine because I've been struggling along without one so far.

sewing, knitting, crochet, project bag, zipper bag, makeup bag, fabric, diy, handmade

Getting back into sewing has definitely rekindled my love for the craft.  I've been daydreaming of all the new clothes I could make with a bigger work space.  (I'm currently sewing on the corner of the dining room table.)

So yeah!! Happy crafting to me! ^.^

Wednesday, April 20, 2016

Adventures in Dyeland pt. 1

One thing that I've been getting more interested in lately is hand-dyed yarn.  So many of the podcasts I watch have connected Etsy shops where they sell yarn, project bags, and other yarn crafting whatnots.  The colors of the yarn and all the different looks are absolutely jaw dropping!  And so, like the good DIY gal I am, I bought some white sock yarn, wound it into a hank on my niddy noddy, and tried my hand at dying it.

how to hand dye yarn at home with food color, things you need
::What You Need - Yarn, Vinegar, Food Color, (not pictured) Pot, Stove-top, Water::

This wasn't my first go at hand-dying. I did some back when I lived in Alabama. That yarn actually got crocheted up into a pretty striped tam.  Anyway, I used food coloring and Easter egg dye pellets this time.

how to hand dye yarn at home with food color
::Soaking Yarn::
how to hand dye yarn at home with food color
::Dye Bath - Hot Water, Vinegar, Food Coloring::
I set the yarn to soak in water and white vinegar for a while before going into the dye pot on the stove.  The dye bath I made was a bunch of yellow food coloring.  When it got up to a simmer, I put in the yarn.  I chopped up some Easter egg pellets to sprinkle around for a 'speckled' effect, but I let the water simmer too much and ended up with a more tonal overall color.

how to hand dye yarn at home with food color
::In the Dye Bath::

I turned off the heat and let the yarn marinate in the pot for about an hour to soak up as much dye as possible.  Then it was wash time! I rinsed/ washed the yarn with a bit of dish soap until the water ran clear and set it out in the sun to dry.

how to hand dye yarn at home with food color
::Rinsing Yarn::

how to hand dye yarn at home with food color
::Exhausted Dye Bath::
I will confess the color isn't exactly what I saw in my head.  It came out much more orange because of the pellets.  I have a couple more skeins of white yarn to play with and I'm hoping those will be better.  I also want to try dying yarn with plants.  I think that will be a really cool adventure.

how to hand dye yarn at home with food color
::Finished Yarn::
Have you tried hand-dying anything, yarn or otherwise? I've been known to dye clothing when I get tired of them lol :). Other than my gold color, what other colors should I try?

Wednesday, February 17, 2016

WIP Wednesday: Cozies and a Cowl

I am currently languishing beneath these two crochet projects... I want them to be finished soo badly, but they're such slow going!  The first is a large order of Beauty & the Beast themed cup cozies.  I have five or so left to make and then on to sewing on the contrasting details.  They are really cute and all, but man oh man are they quite boring to crochet!  lol!

crochet cup cozy beauty and the beast theme belle's gown yellow yarn disney

The pattern is very simple.  Just 12 rounds of single crochet with 30 stitches per round.  I decided to work in joined rounds instead of a spiral because sometimes I slip into auto pilot and would totally lose count while spiraling.  Originally, I was going to crochet a chain with the darker yellow and attach it around the cozy body, but I didn't like how it looked.  So after a bit of brainstorming, I decided to switch to two strands.  I think it looks much better.  Wish me speedy fingers as I need to get these finished this week!

crochet cup cozy beauty and the beast theme belle's gown yellow yarn disney

The second project that is loooooming overhead is a hooded cowl with ears.  I started working on this a few weeks ago and got all the way through the cowl part and into the hood... only to realize that it was going to be too small.  So I had to frog the whole thing out and start over again.  Something about frogging and restarting a project really takes the wind outta your sails -___-  Anywho,  this is how far I've gotten in the reboot.

crochet hooded cowl with ears fox ears handmade winter accessory
 
I'm working from an inspiration photo my friend sent me (-via Ravelry-).  I originally wanted to make the piece out of a super bulky yarn, but I couldn't find any in the right color.  So I'm holding 2 strands of red heart worsted together.  Even though the yarn is very thick, it still is slow going.  I just wish these projects would go faster so I can start on other things!

This experience has shown me that when I commit to projects like these I need to try my best to knock them out immediately.  Since they're been in progress so long I'm really losing my steam behind them, but I have to finish.  I need to get re-motivated.

I know that after I finish these pieces, I'm taking a nice break from crocheting anything for other people.  I've been doing more daydreaming and project planning for things I want to make myself.  I just need to get these done in order to start those new things.

Monday, October 26, 2015

Finally I'm Finished: Chunky Yellow Blanket

diy chunky yellow bernat collegiate crochet blanket afghan lapghan

Recently I've been seeing a lot of chunky crochet pieces throughout my Instagram feed as makers were getting their fall lines ready.  I love the look of the squishy bulky yarns and wanted to take a break from the worsted yarns I generally use.  So I pulled out a huge ball of Bernat Chunky Collegiate from Joann's clearance and worked up a giant granny square.

diy chunky yellow bernat collegiate crochet blanket afghan lapghan

My initial idea was four the blanket to have a lacy look to it, so I worked the whole piece with a 15mm hook.  I haven't used that hook in quite some time ^.^ There was no real plan past 'use all the yarn'... It only took me a couple days to finish.  When I got to the last row, I had to frog it 3 times and go down to a 9mm hook to get the last bits of yarn to stretch for the whole border o.O
diy chunky yellow bernat collegiate crochet blanket afghan lapghan

I love how lacy this blanket came out while still retaining the chunky squish I was craving!  I have 3 more skeins of the Bernat yarn in my stash and just might have another of these blankets in my future! ^.^
diy chunky yellow bernat collegiate crochet blanket afghan lapghan

Thursday, September 3, 2015

DIY Product Labels

[This is a repost of the original one from 8/20/15 which I accidentally deleted -___- silly me]


Ever since I started gifting and selling my crochet work I've known I should have some kind of label.  My mom is the main person reinforcing/reminding me of this fact.  So I decided to search on Etsy for customizable ones.  All the ones I was finding were more expensive than I could justify.  So I did what I always do, I found a DIY soulution.  ^.^

On Pinterest, I came across this pin of how to make name labels for your children's clothing and I thought the method would work perfectly for my needs.

The materials you'll need for this are:
  • fabric transfer paper
  • an image flipped horizontally to print
  • ribbon (I used 3/8" and 5/8")
  • scissors
  • iron & hard surface
  • needle & thread
I started off with the idea to hand-letter the design but it didn't translate well to the computer (I need more practice with my lettering I guess ^.^)  I liked this idea with the mixed fonts so I reproduced it digitally.

diy fabric tags product labels
not bad for my first foray into hand-lettering huh!

diy fabric tags product labels
workspace...

Next I flipped the image and copied it into a table in a Word document.  Each row of the table was 1/2 inch tall.  I printed the whole page onto the fabric transfer paper and cut off the first row of labels.

diy fabric tags product labels
Avery Light Fabric Transfers from Walmart -here-

Following the transfer instructions, I ironed the printed labels onto the ribbons.  They had to cool for a couple minutes before I could pull the backing paper off. 

diy fabric tags product labels
The instructions say to iron on a hard surface, but all I had was the regular ironing board.  It came out fine.
 
Here are the finished labels before I cut them apart.  I'm going to go ahead and iron labels on to all the rest of the ribbon spool soon.  That way I have them ready to go whenever I finish my next project.

diy fabric tags product labels

The finished labels cam out pretty great!  I'm very proud of myself :)  I like the white and cream colors I have, but I think I'm going to get some smooth satin ribbon instead of the grosgrain I used.  Also, the 5/8" thick ribbon worked a lot better than the 3/8" one.  The only thing I didn't do on the finished labels was try to burn the edges so they don't unravel.  Hopefully that doesn't mess up the transfer.  I'm really happy with how they came out ^.^ 

diy fabric tags product labels
I think the little cross stitches add the the cuteness :)


Now on to put labels on all my hats and blankets and anything else I crochet!

Friday, July 17, 2015

DIY: Saddle Stitched Notebooks

A couple months ago, I came across these cute little notebooks while browsing at Joann's.  I loved their size and simplicity so I bought the set (there were 3 but I used one for my May Listers Gotta List challenge).  The size was perfect for making me feel comfortable as a new papercrafter... not too much space, but enough to get artsy.

inspiration photo


As I was working through the May challenge, I kept thinking... I can make a book just like this.  So I watched a couple videos on YouTube on saddle stitch binding and set out to make my own notebook.
(If you want to see a really well explained video on how to do the saddle stitch, watch Sea Lemon's -here-.  She also has a playlist of a bunch of different binding methods.)

Here are the supplies you'll need:

supplies needed
Paper trimmer/scissors, small hammer, yarn needles, embroidery thread, ruler, awl/pointed object. 
Not pictured: binder clips.
paper selections
Printer paper or whatever paper you want for the pages, cardstock or other heavyweight scrapbook paper for the cover.

[Measurements: small books 8"x5.5" / medium books 9.5"x6.5"]


Step 1: Measure the cover paper and page papers to desired size.  Using a paper trimmer or scissors, cut all the sheets down. (I went with the measurements for the medium size book.)

cutting the pages

Step 2: Clamp pages together using binder clips to make sure they don't move.  Use a ruler to find the center of the cover page and make marks every .5" down that center line.  This is where you will pierce holes for the stitching.

marking the stitching holes


Step 3: To pierce the holes, the proper tool to use is an awl.  But if you're like me and don't have one, a small hammer and a pointed object will work.  (I have used a nail, a yarn needle, and a knitting needle.)  Use the hammer and pointed object to punch holes down through all the pages.

punching the stitching holes


Step 4: Now to do the saddle stitching.  Thread the yarn needle with embroidery thread (waxed bookbinding thread is recommended, but I didn't have any and embroidery thread is more colorful) and starting on the center hole on the inside of the book, bring the needle through and to the outside.  Sew a running stitch through the rest of the holes going to the right.  Loop around the edge of the book and sew a running stitch through the same holes going all the way back to the left edge.  Loop around that edge and finish sewing a running stitch back towards the center.  Tie the ends together and tuck your ends under the other stitches.

sewing a saddle stitch book


Step 5: Fold the cover outward and the pages inward.  Then fold the cover over the pages and press down.

folding the pages


Whew!  Your book is pretty much done from here.  The following steps are purely aesthetic and optional.

finished handmade book


Step 6: Using a paper trimmer/scissors/rotary cutter and trim the edges of the pages so they are flush.

trimming raw page edges


Step 7: Corner round the pages. (Because who doesn't love rounded corners, right?)

corner rounding punch


Step 8: Use washi tape or fabric tape to cover binding and to add extra sass!

washi tape spine cover


Step 9: Stamp the date on the back cover of your new one-of-a-kind notebook.

stamping


Now you have a cute little notebook for your poems, stories, diary entries, or crochet ideas!  I love making these so much that I have to resist :)  I mean, I only need so many little notebooks after all.  They are so easy to make in less than an hour and would make a unique gift.  If you make one take a photo and tag me on instagram (@nadiratani) I'd love to see it ^.^

two sizes of DIY handmade saddle stitched notebooks

two sizes of diy handmade saddle stitched notebooks
This photo shows a couple binding options: top- stitching every inch, middle- stitching every 1/2 inch,
bottom- stitching every 1/2 inch with fabric tape covering.

Friday, July 10, 2015

Finally I'm Finished: Bellatrix in Purple

Back in March a friend of mine asked me to make a blanket for his soon-to-be baby girl.  He asked that it be shades of purple and of course I obliged. At the time I was working on my first Bellatrix blanket and figured I'd use this as an opportunity to get more familiar with the color changes.
crochet gift
I chose 3 shades of purple and a cream.  There's something quite satisfying about a nice monochromatic color scheme.  I think I'll be doing more monochrome. Anywho, I really enjoyed working with the colors.  Plus, I was able to use up some of my yarn stash (which is always nice).  Since I knew this baby's gender, I chose to use a scalloped edging instead of the original reverse single crochet to make it more girly.
crochet gift
The baby shower was about 2 weeks ago and they loved the blanket!  I was secretly hoping that some of the guests would ask me to make them one, but alas no one did. I got lots of compliments tho. So hopefully in the future someone will remember me and my awesome crochet skills :)
crochet gift

Thursday, July 9, 2015

WIP Wednesday (on a thursday): Leo Baby Blanket

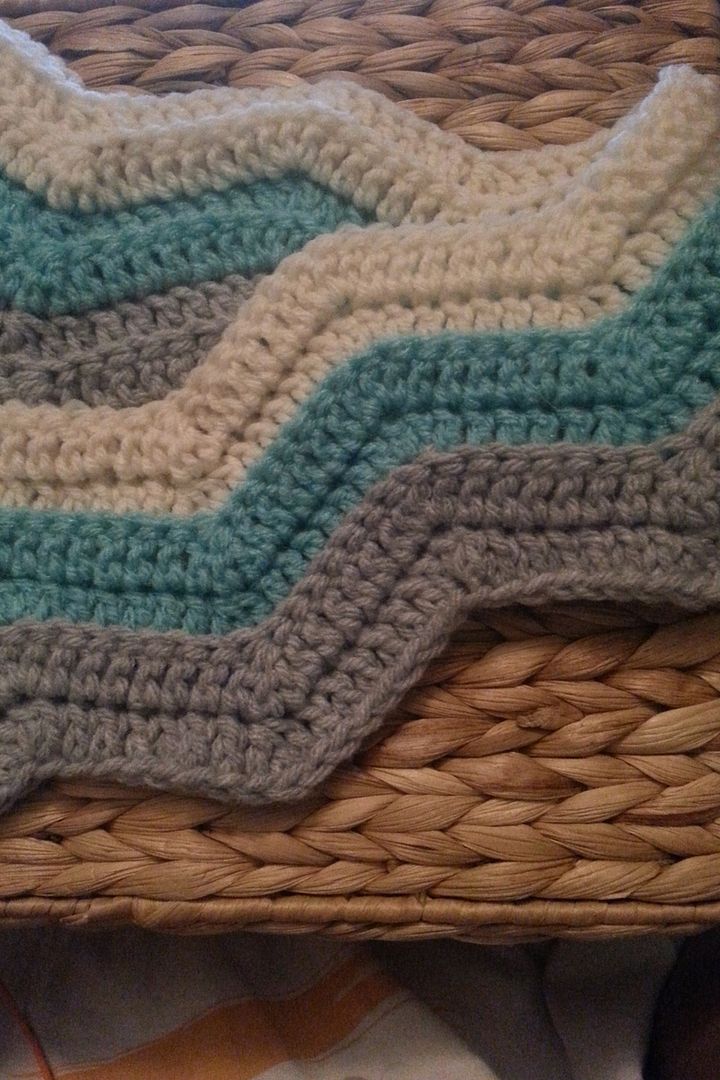
A few months ago a past coworker of mine asked me to make a crochet blanket from her grandbaby coming in august.  She sent me this photo from pinterest with the colors she wanted and I decided on the pattern.
The pinterest pin


apt-302.blogspot.com
I've been working on this blanket on and off for a couple weeks now and I'm probably half way done.  I must say that the chevron pattern is kinda boring, lol. Its repetitive fashion is really peaceful but since every row is the same and the stripes are the same size, it tends to wear on me.  I find myself only wanting to working on it a little bit at a time.  Hopefully I'll be done with it within the next couple weeks.  It is a really pretty color combo and I'm sure I'll log the pattern away as an item to list in my etsy shop.  We'll see :)
I named this blanket Leo after the constellation since the baby is due within that astrological sign.  Leo is also one of the first constellations I was able to identify.   It also shows a juxtaposition of ideas... a soft vulnerable baby and a powerful lion.  As I'm typing this so many other ideas are running though my head stemming from the baby & lion image. Thoughts of protection and Heaven.
apt-302.blogspot.com
I hope you like this blanket & I cannot wait to finish it and get it to it's new home!

Wednesday, July 1, 2015

Listers Gotta List: June Wrap-Up

Hi there!

Another month has come and gone... le'sigh... It's really hard to believe how fast the time flies. Anywho, let's get into June's Listers.
@theresetgirl
I used one of my handmade saddles stitched books for my lists this month.
With this month's Listers Gotta List prompts, I tried a few different things design wise.  I broke out the watercolor paints and brush markers.  I printed directly onto more journaling cards. I even tried writing within cut out shapes... But I didn't really like it. *shrug*
@theresetgirl
@theresetgirl
My favorite pages this month are: 18) My Favorite Possessions, 22) Happy Moments I Wish I Could Relive, 23) All the Places I've Lived, & 28) Favorite Comfort Foods.
@theresetgirl
@theresetgirl
Cori (@theresetgirl) has already released July's list of prompts, but I'll be taking a break for the month.  But fear not! I plan to start a new project/hobby spinning off of the fun I had with Listers Gotta List ^.^