
One of the first things I decided to definitely try to DIY was my veil. I figured that a veil is, at its base, a piece of tulle, a comb, and a bit of trim. I can handle that. I was an apparel and design minor in college after all! If I can't make a wedding veil, my teachers would be SHAMED! lol
In the midst of my dress search, I tried on a veil and unfortunately it weren't pretty... I totally felt like I couldn't breathe! I went all panicky and what not. Afterwards I thought, "well I guess I need to walk around with a sheet over my face as practice..." *shrug*
So back to the DIY. I first took pictures of veils that I liked to figure out what style to create. In the end, I chose a 2-tier elbow/fingertip length design. This would allow the top tier to double as the blusher. It would have a comb attachment and a nice floral trim.
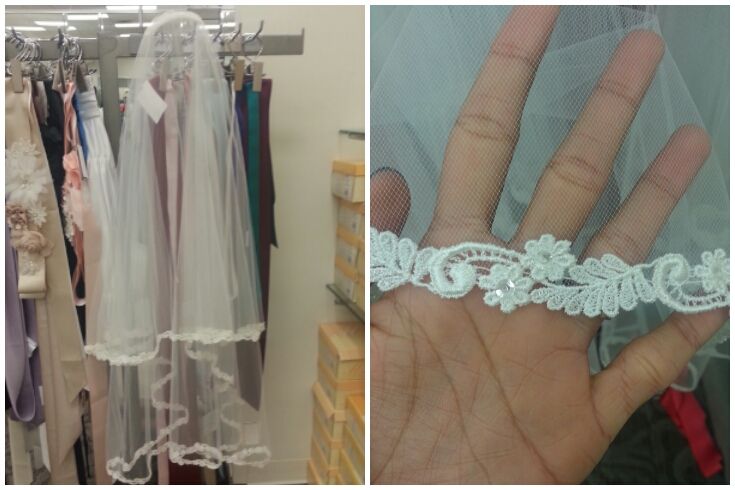 |
| Inspiration veil from David's Bridal |
Of course, like a good DIY'er, I did quite a bit of pinteresting to find a usable pattern. I found and really like this one. The instructions were clear and super easy to follow. Two thumbs up! I got my tulle from Joann's because I cannot justify not using a coupon on my crafty purchases... The hair comb came from my local beauty supply store and the trim was from the fabric shop I wrote about a little bit ago <original post -here->.
So yeah, I jumped right on it.
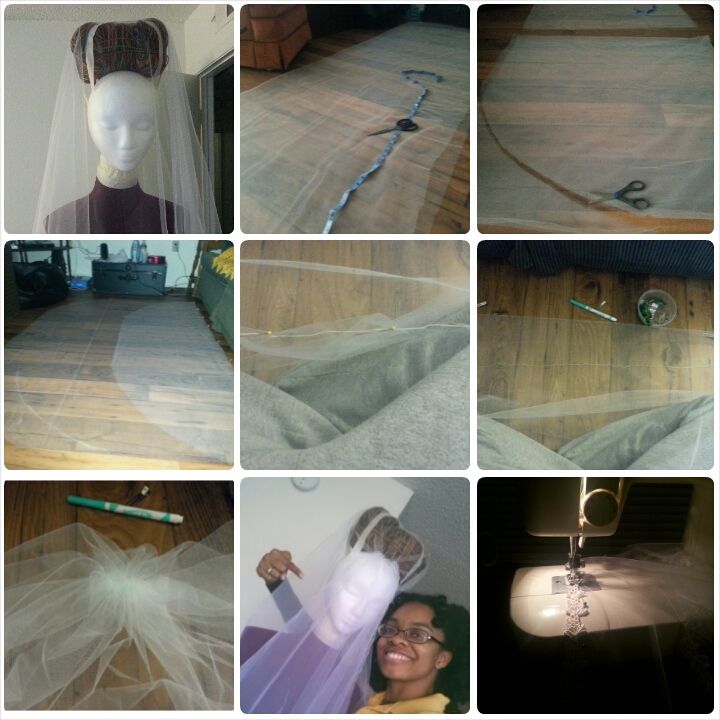
Picture 1: Determine the length you want for your blusher/top tier and back tier.
(I rigged up my dressform to simulate me with my wedding hair :) and draped the tulle over to determine how I wanted the veil to fall. My dress is also on the form so I could make sure the details showed the way I wanted.)
Pictures 2 & 3: Lay out the tulle and cut to the desired length. Round the edges.
Picture 4: Fold top tier over bottom tier and clip.
Pictures 5 & 6: Pin along the fold line and sew a wide running stitch to gather.
Picture 7: Gather tulle along the stitch line. Sew back and forth a couple times to secure.
Picture 8: Attach the hair comb to the gathered area.
Picture 9: Sew on trim
The first hard part I ran into was gathering the tulle. Who woulda thought... It was SO fiddly and trying to hold and sew a straight line down that wispy fabric was enough to set my teeth on edge! But eventually I got it done. [imagine accomplished face Caleisha here ^.^] After I successfully gathered everything, I began the super-tedious task of pinning the trim to the edge. Once I made my way about half way around, I noticed that there was way too much ruffling happening in the front. That caused me to have to remove the whole gather -___- and redo with less material.
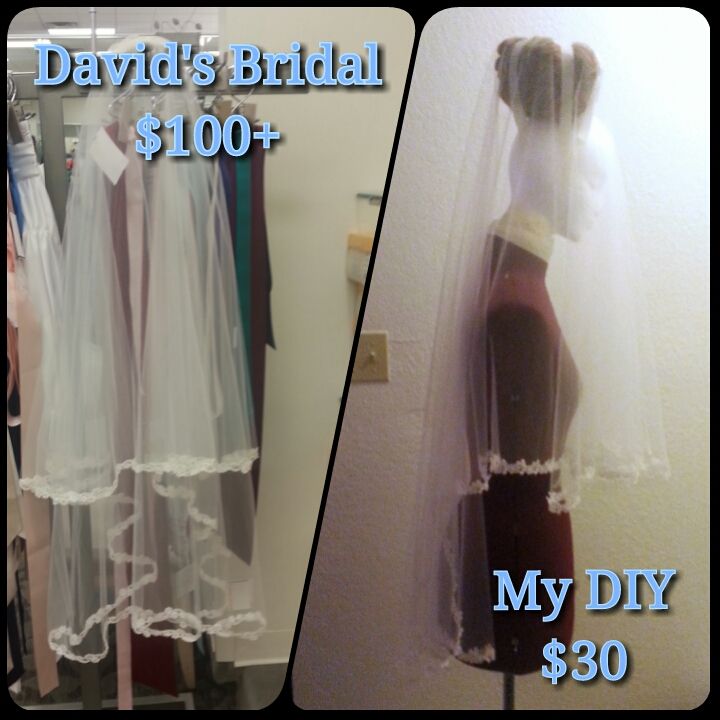
It took quite a bit of back & forth and trying different things before I had a veil that I could be proud of. I'm very glad I decided to make my veil instead of just buying one. There is just something about knowing that you yourself made aspects of your wedding details.
One of my favorite details of the finished veil is the price comparison to the inspiration veil. As a thrifty gal, this seriously warms my heart *.* BOOO-YAAA!!!
I can't wait to see the veil with my dress on our wedding day! (1 month 4 days & counting ^.^)
No comments:
Post a Comment
Thanks for your comment ^.^ They make my day!